


Document Actions
gvSIG-Desktop 1.1. Manual de usuario.
First of all, load the cartography you need to make a clipping onto a gvSIG view. Select the “Save as raster” tool which appears in the tool bar.

Now select two points in the view to define the rectangle that will contain the area to be saved. The following dialogue box then appears. If the rectangle you have marked is too small, this box will not appear and you will have to select a larger rectangle.
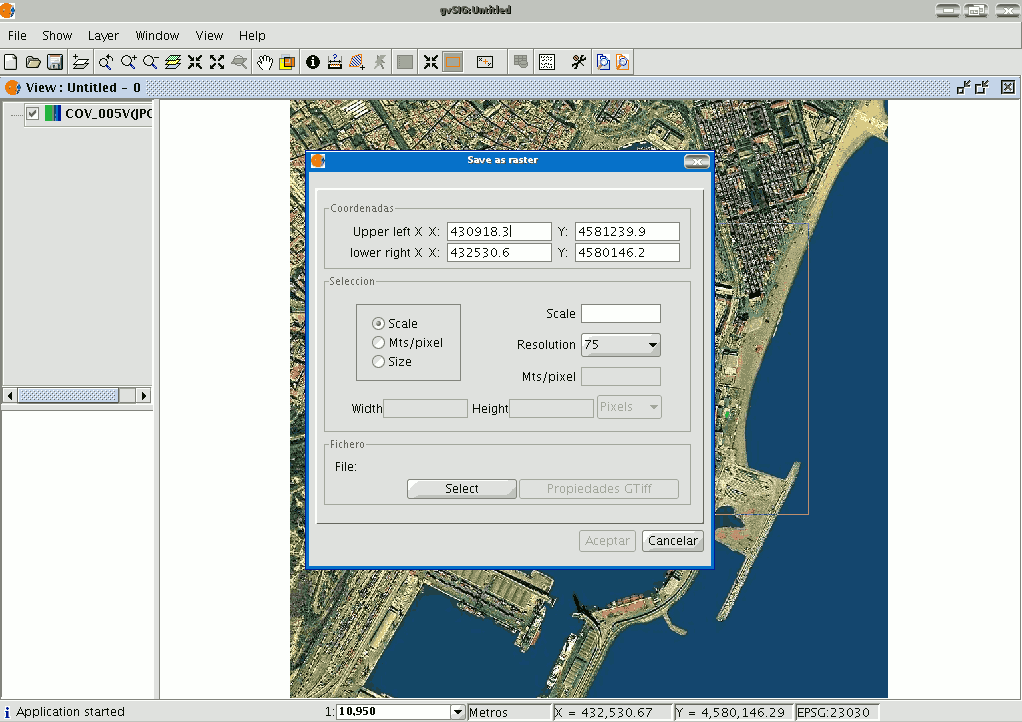
The coordinates of the points which delimit the selected area in the view appear at the top of the “Save as raster” dialogue. These coordinates can be changed manually.
The “Selection” area appears in the centre of the dialogue.
This includes three selection methods:
Scale. If you select “Scale”, the “Scale” text box and the “Resolution” pull-down menu are enabled. The pull-down menu values correspond to the points per inch in the exported image.
Input a value for the scale and press “Enter”. The Mts/pixel values and the “Width” and “Height” size of the output image are recalculated.
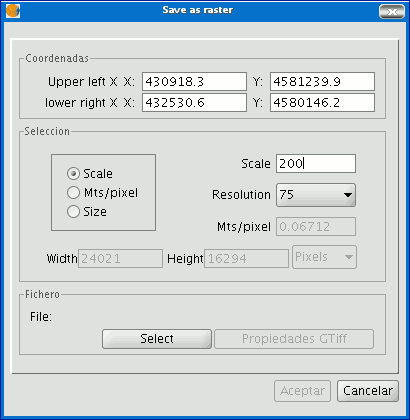
Mts/pixel: If you select “Mts/pixel” from the three radio-buttons column, the text box to input this value will be enabled. Input a Mts/pixel value and press “Enter”. The “Scale” value and the size (“Width” and “Height”) of the output image will automatically be recalculated.
Size: If you select “Size”, the text box to input the “Width” and “Height” values will be enabled. When you input one of these values, the other will be recalculated automatically to maintain the height/width proportions.
The remaining data (“Mts/pixel” and “Scale”) will also be recalculated automatically. You can also select the unit of measurement you wish to see the values in via the “Pixels” pull down menu.
Click on the “Select” button to choose where you wish to save the image.
The most suitable driver will be loaded according to the type of file you choose (N.B. watch how the button to the right of “Select” changes), i.e. when a .jp2 output file is selected for example, you can open the properties box which corresponds to a Jpeg2000 format.
The formats available to save a file are geoTiff, jpg (georreferenced with a worldFile) and jpeg2000.
An ecw extension can be selected exceptionally and only with Linux kernel 2.4.
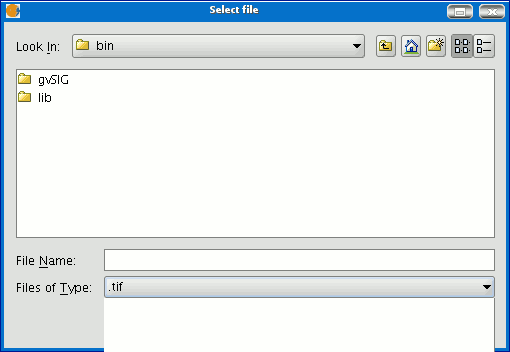
When you select the output file the properties button is enabled.
For geoTiff files, a box similar to the one below appears:
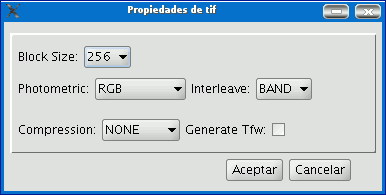
Block size: The block size defines the amount of data read each time so it can be compressed. The greater the block size the faster the compression speed but more memory is used.
Photometric: [MINISBLACK | MINISWHITE | RGB | CMYK | YCBCR | CIELAB | ICCLAB | ITULAB].
This assigns the photometric interpretation.
This is RGB by default, because the input image has 3 byte-type bands. Interleaving: [BAND | PIXEL]. The tiff files have band interleaving. Some applications only support pixel level interleaving. In these cases, this option can be modified. Compression: [LZW | PACKBITS | DEFLATE | NONE] This assigns the compression to be used. The default option is none.
A table like this will be obtained for jpg.

Block size: The block size defines the amount of data read each time so it can be compressed. The greater the block size the faster the compression speed but more memory is used.
Compression: This allows the image’s compression level to be adjusted.
Progressive: This allows you to make progressive jpgs.
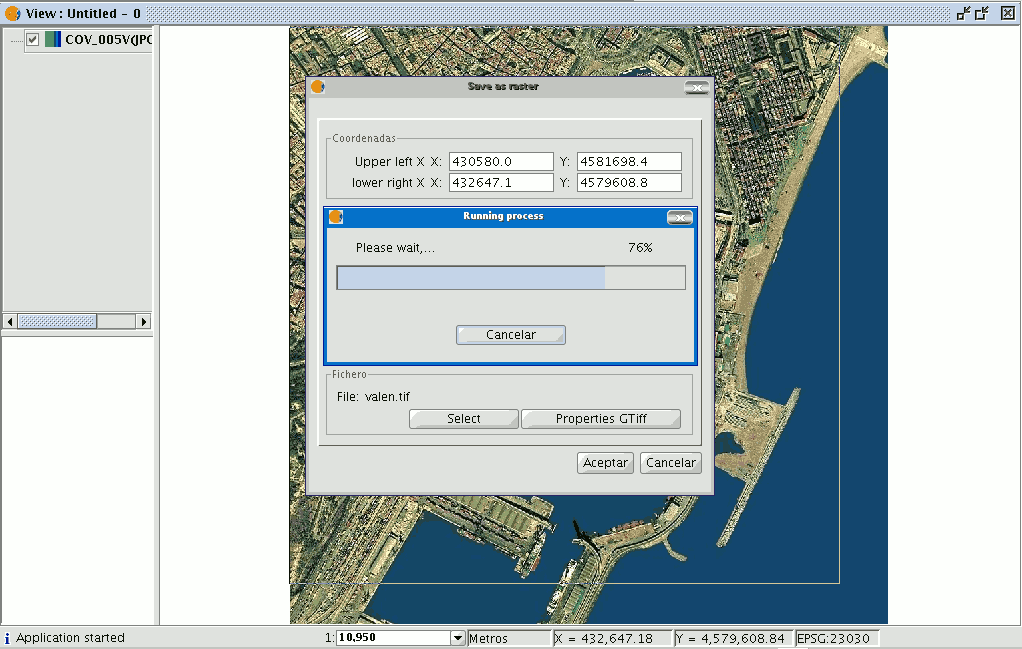
When the image has been selected and the properties have been adjusted, click on “Ok”. A progress bar appears.
This process may take an extremely long time depending on the size of the output image.
It can take from a few seconds to several days. Thus, it is advisable to control the size of the output image via the number of pixels so we are not taken by surprise.
When the process finishes, a statistics table indicates the saved image path, the disk size of the output image, the length of the process and whether the image has been compressed or not.
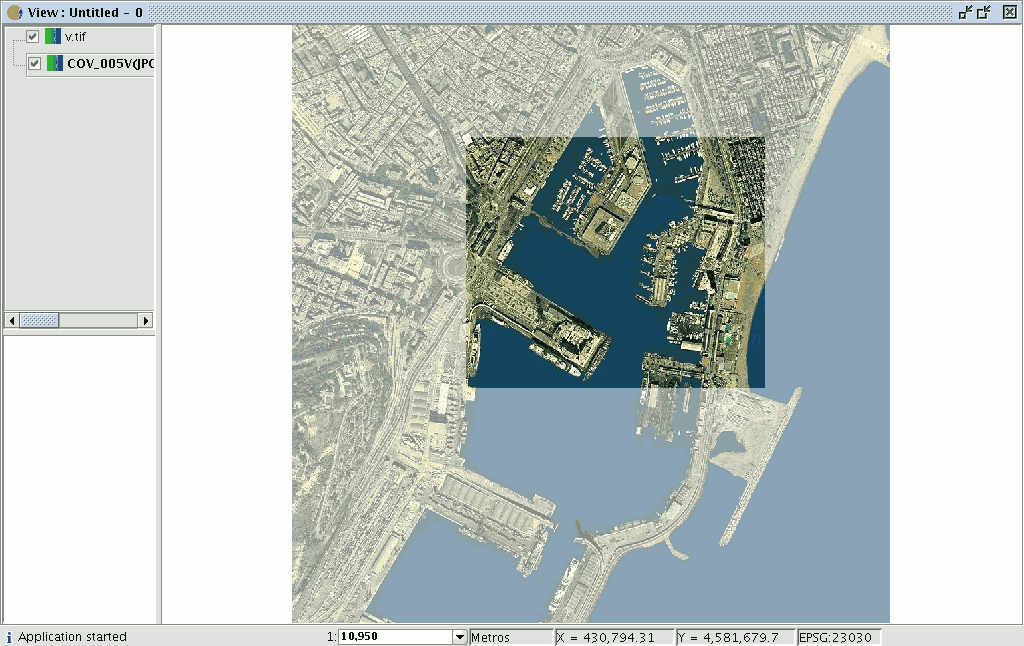
To check that the georeferencing has been correctly carried out, you can load the image you have saved as another layer and apply a transparency.


